
Introduction
Microsoft has announced that from May 1st 2026 on, IDCRL authentication is disabled and will no longer be supported for SharePoint Online connections. To ensure continued access, you must use an Entra ID App Certificate for authentication from this date forward.
For PeopleSync to OAuth with SharePoint Online, you must create an app registration in Azure Portal that uses certificate authentication and assign the necessary permissions.
In this guide, we will show how to configure an existing SharePoint that is connected to SharePoint Online to use OAuth.
How to Migrate to OAuth
Migrating an existing agent consists of the following steps:
-
Creating an app registration in Azure Portal
-
Creating an Entry ID App Certificate in PeopleSync and uploading the certificate to the app registration in Entra ID.
-
Setting permissions on the app registration in Entra ID.
-
Configuring SharePoint Agent.
Creating an app registration in Azure Portal
To create an app registration in Microsoft Azure Portal, do the following:
-
In a browser, navigate to https://portal.azure.com, then go to Azure Active Directory.
-
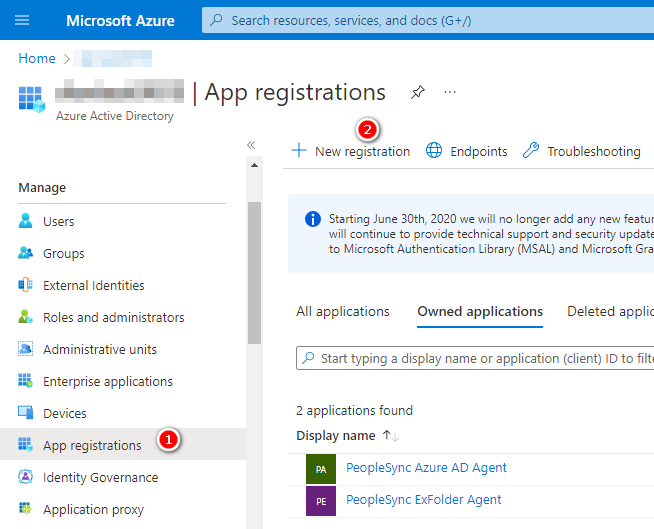
On the left-hand side, select App registrations, then new registration.
-
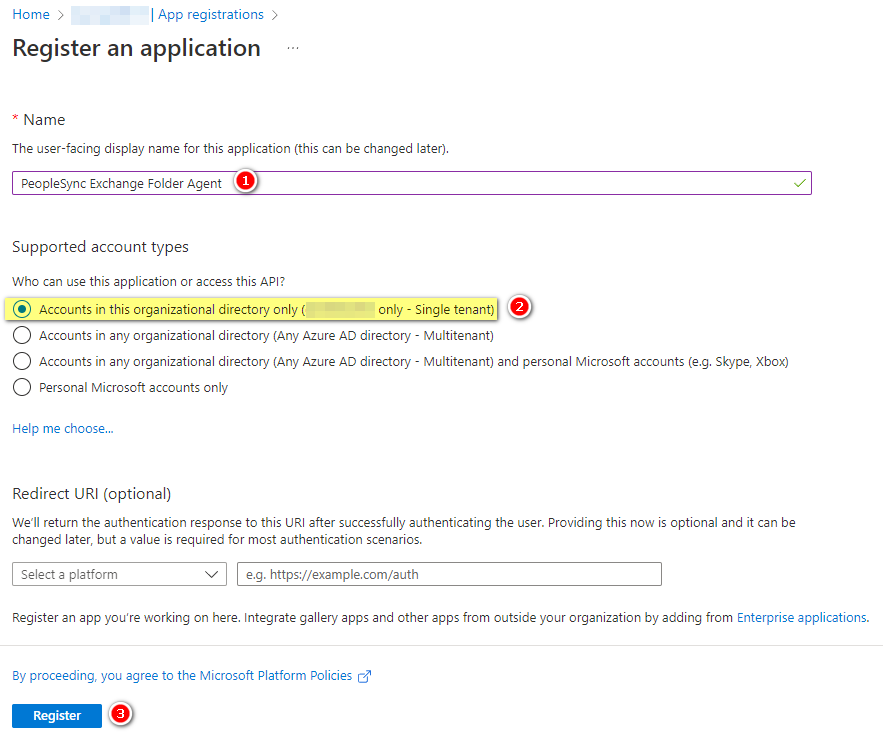
Enter a name for the app registration. As account type, select Accounts in this organizational directory only. Then click on Register.
Creating an Entry ID App Certificate in PeopleSync
-
In PeopleSync Console, navigate to Agents > Action Accounts.
-
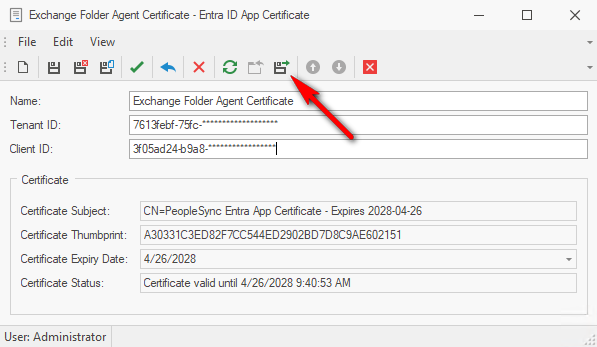
Click on the arrow next to the New icon and select Entra ID App Certificate.
-
Enter client id and tenant id from the newly created Entra ID app registration.
-
Click on the Download Public Key PEM) icon to download the certificate’s public key:
-
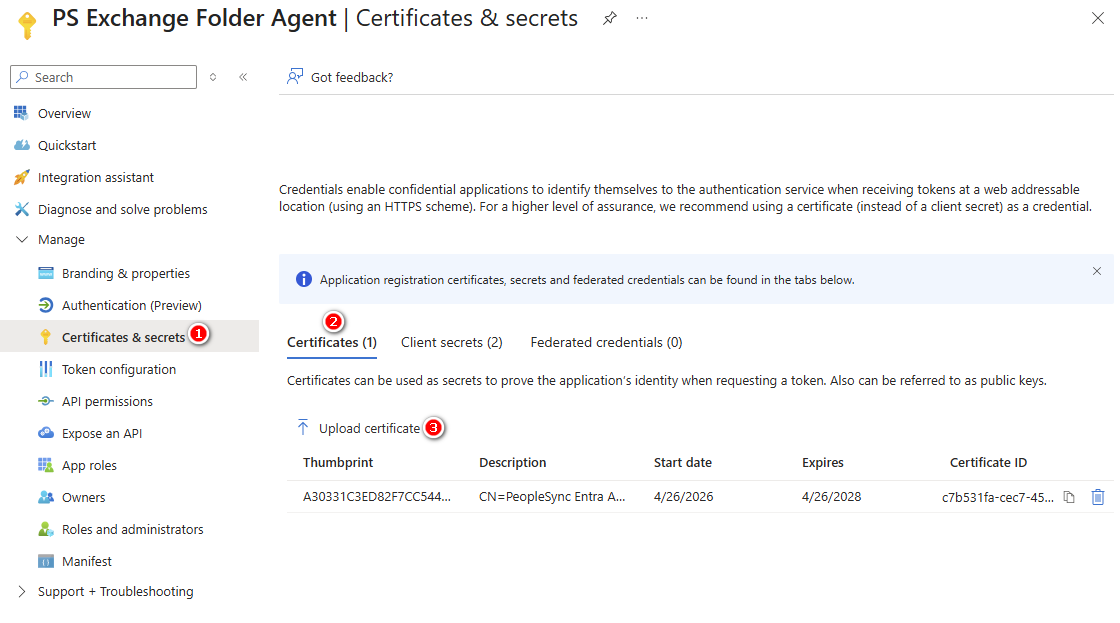
In your Entra ID app registration, go to to Certificates & Secrets > Certificates and click on Upload Certificate. Upload the certificate you downloaded from PeopleSync in the previous step:
Assigning permission to access SharePoint Online
To access SharePoint Online, the SharePoint Agent needs an app registration in Azure AD with specific API permissions.
-
In a browser, navigate to https://portal.azure.com, then go to Entra ID.
-
On the left-hand side, select App registrations, then open the relevant app registration in the list.
-
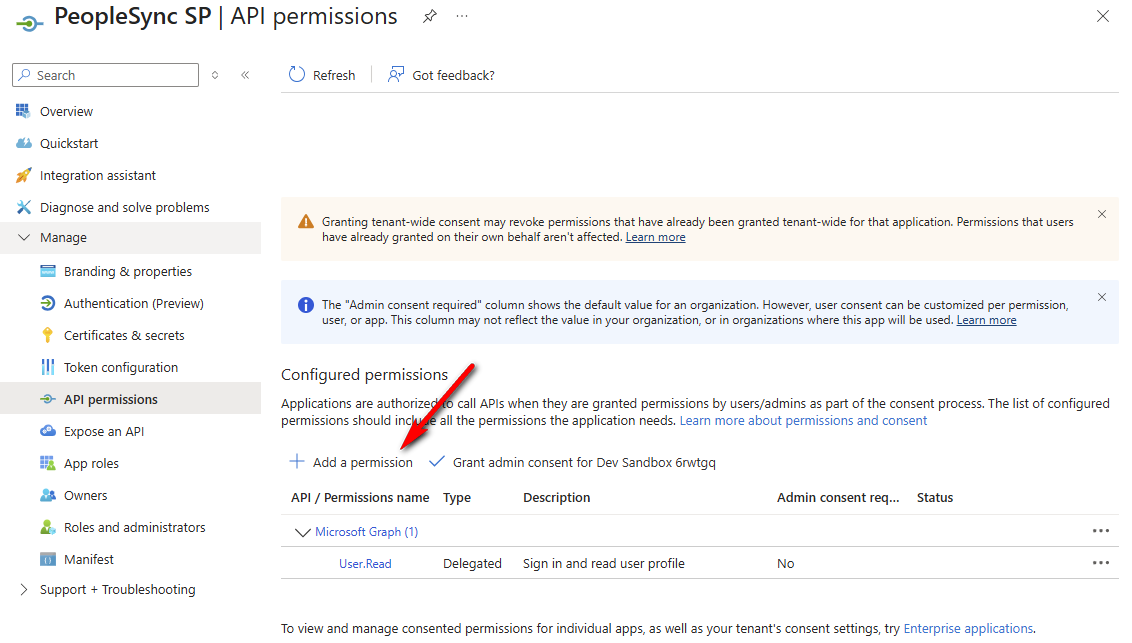
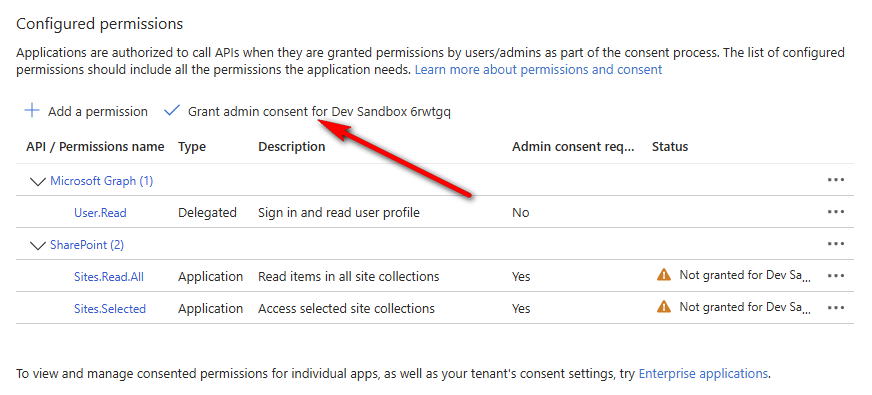
In API Permissions, click on “Add a permission”.
-
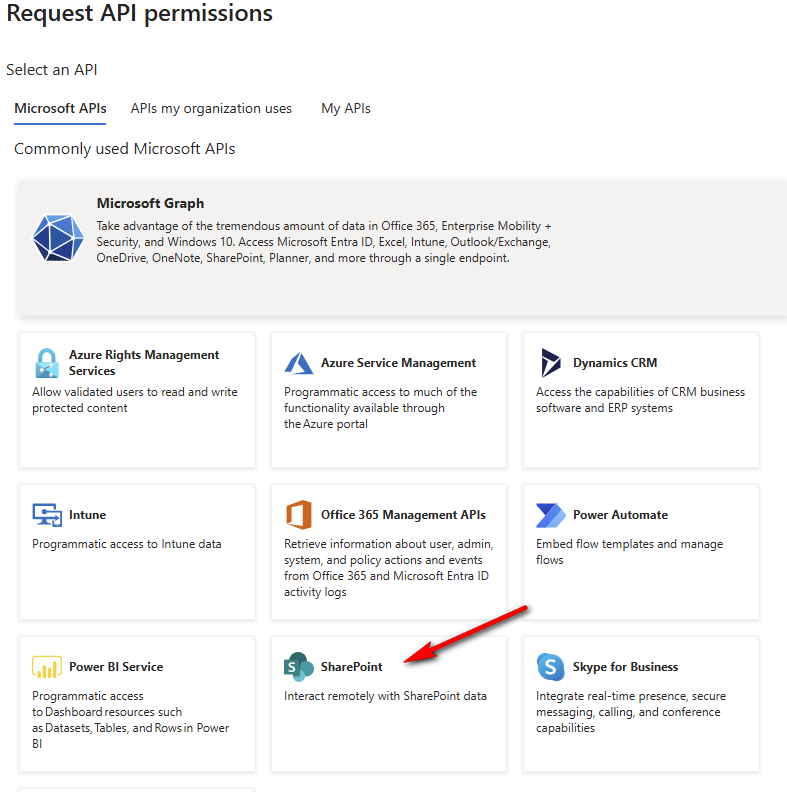
Select SharePoint API:
-
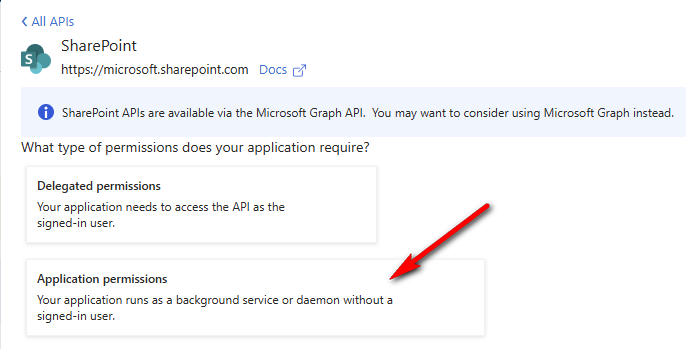
Choose Application permissions.
-
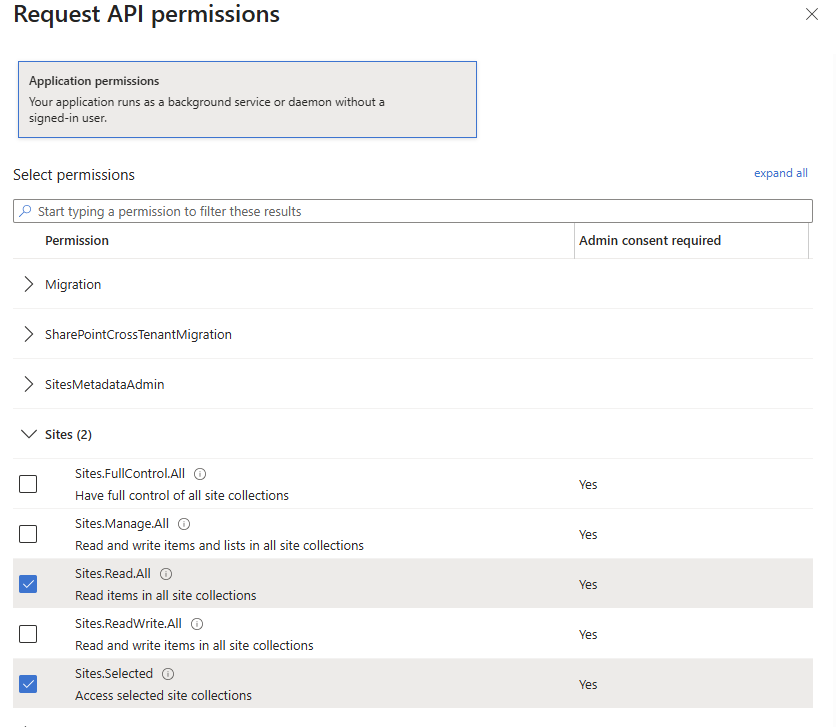
Choose Sites.Read.All and Sites.Selected permissions.
-
Click on “Add permissions”.
-
Grant admin consent for the permissions.
Configuring SharePoint Agent
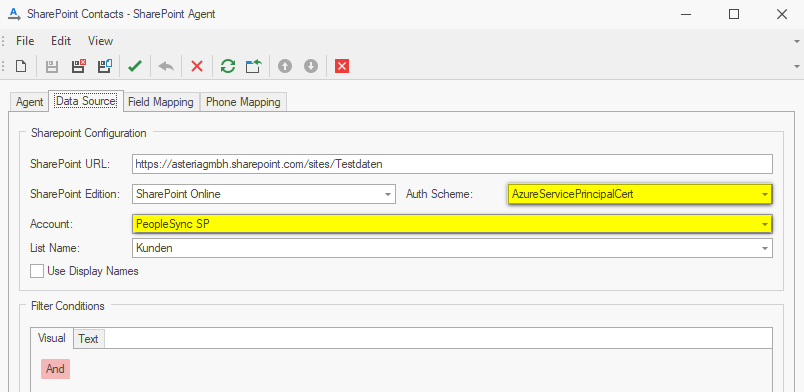
Use the Entra ID App Certificate in your SharePoint Agent. Make sure Auth Scheme is set to AzureServicePrincipalCert:
-
In PeopleSync Console, open your SharePoint Agent.
-
In Configuration, switch Account to your Entra ID App Certificate. Also change Authentication Mode zo
-
Save the changes you made.
-
Run the agent manually by clicking the Play button in the list of agents. Check in PeopleSync Console log if the agent ran successfully.
Note: You could also create a test address list and SharePoint Agent alongside your production SharePoint agent to test the new authentication without impacting production.